How I Use SketchUp: My Full Interior Design Workflow with Clients
SketchUp is the only design software I use in my interior design projects. I don’t use CAD, I don’t hand draw anything and I don’t switch between multiple programs for my design work.
Everything - from space planning to detailed joinery designs - is done using SketchUp Pro and Layout.
Over the years, I’ve refined my workflow to be as efficient and effective as possible and in this post I’ll take you through exactly how I use SketchUp to create, present, and document my designs.
Why SketchUp?
Most designers jump between programs - AutoCAD for drafting, Photoshop for presentations and SketchUp for 3D modelling. I don’t do it that way.
SketchUp Pro does everything I need: 2D plans, 3D models, elevations, joinery details even lighting and electrical plans.
With Layout, I can create professional client presentations without ever leaving the SketchUp ecosystem.
Here’s how I use it across my entire interior design workflow…
Step 1: Space Planning & Concept Development
Every project starts with space planning.
If I have a floor plan, I bring it into SketchUp - whether it’s a CAD file, a scanned PDF or even a real estate agent’s floor plan (though those are often inaccurate, so I check dimensions). From there I create multiple layout options, testing different furniture arrangements and possible options.

Step 2: Presenting Initial Concepts
Once I’ve developed a few strong layout options, I present my initial design concept to the client using Layout.
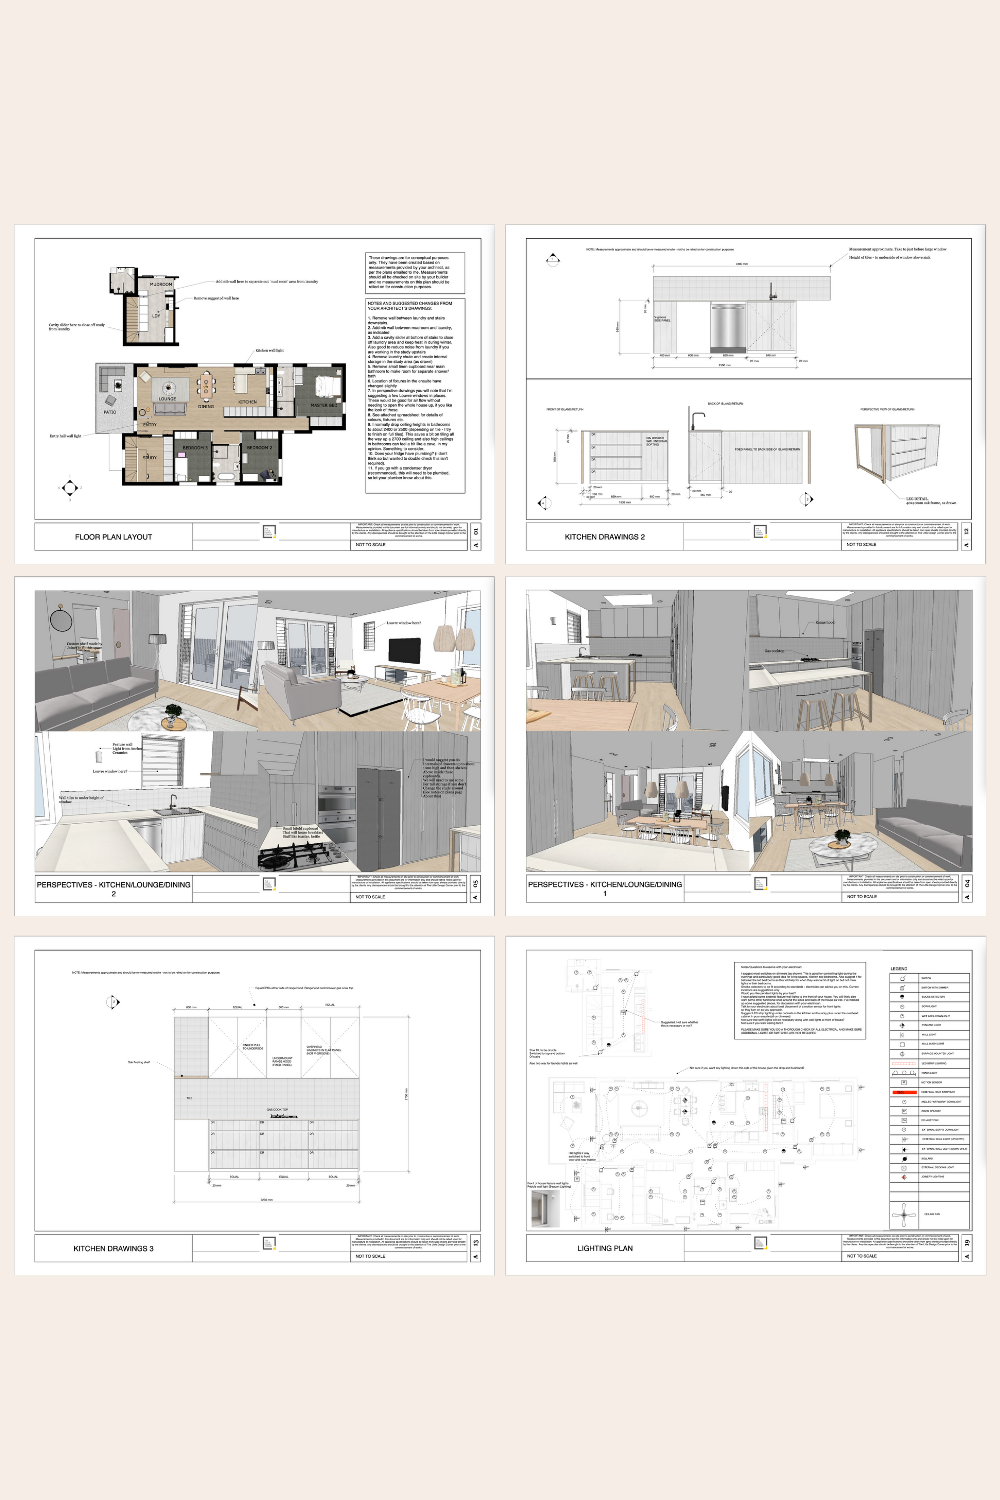
This concept document might include: floor plan variations with different layout options, notes about the concept ideas, mood boards and inspiration images to communicate the aesthetic. Depending on the project I might also include high-level joinery concepts, like kitchen layouts or built-in storage ideas.
At this stage, I keep everything 2D. Clients always make changes and working in 3D too early is a waste of time. Keeping it simple means I can adjust layouts quickly without reworking complex models.


Step 3: Building the 3D Model
Once we finalise the layout, I move into 3D modelling.
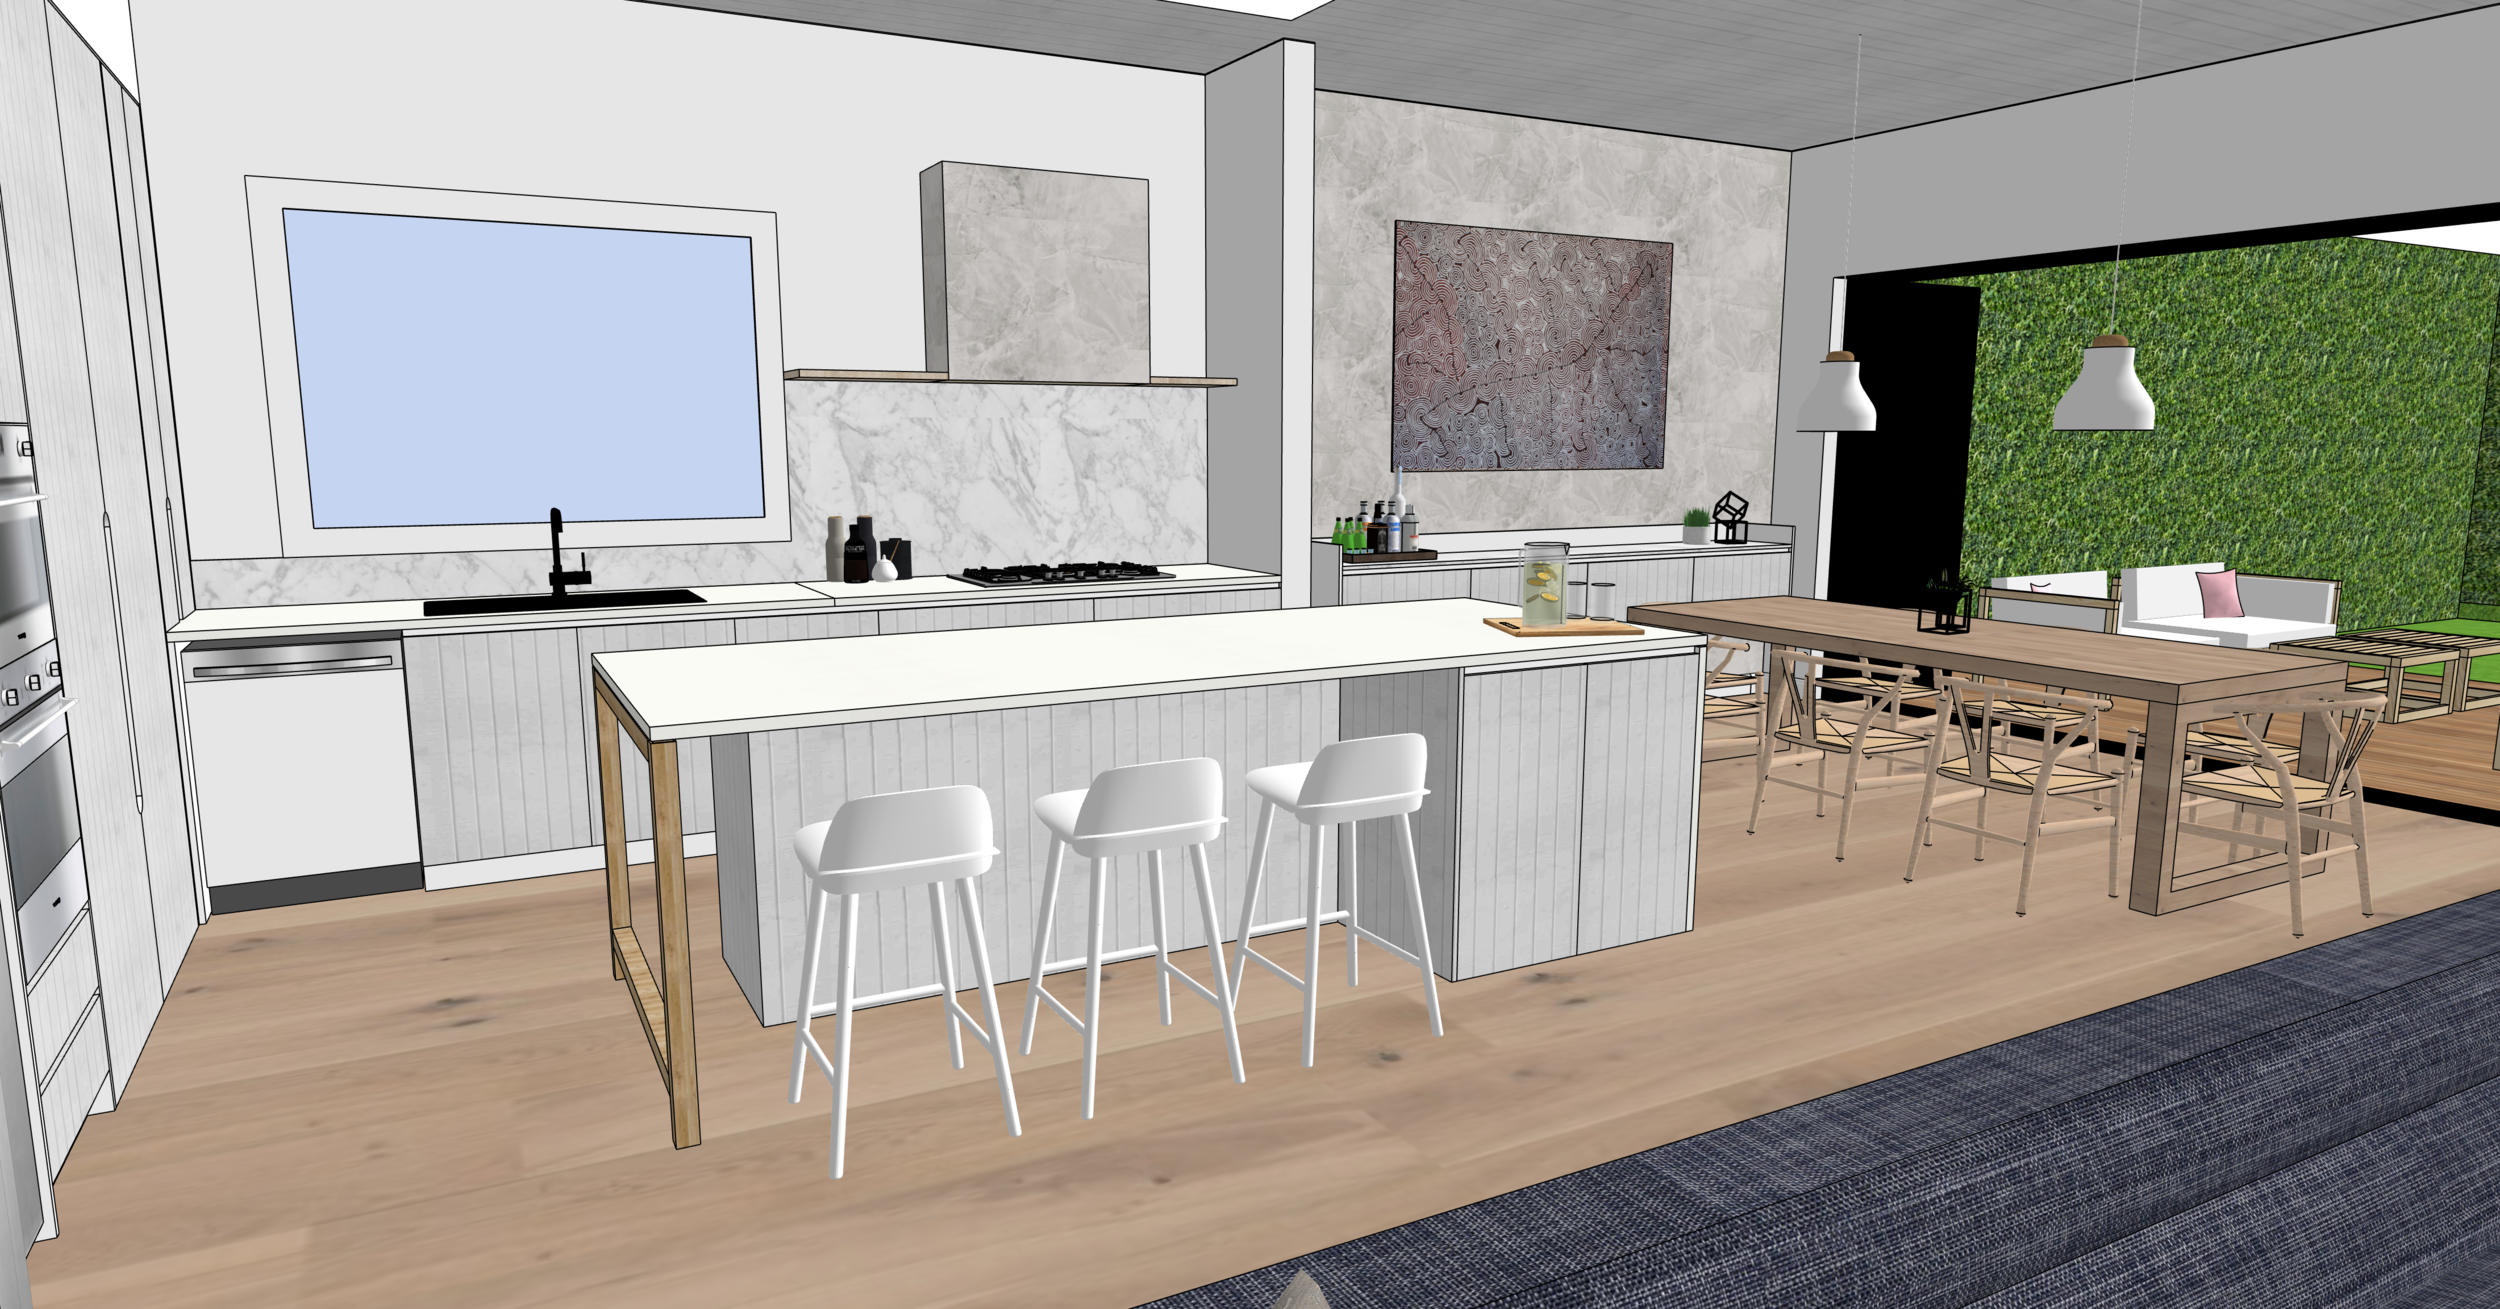
This is where the space really starts to come to life. In SketchUp I start to pull up walls, model furniture and add fixtures and accessories. I also start to experiment with materials and lighting. Clients love this part because they can visualise their space and start to see it come to life. I can also do a live walkthrough of the SketchUp model for clients, which further helps them understand how the space will look (and helps with faster client approvals!).

Step 4: Joinery & Custom Design Elements
Detailed joinery drawings are the most time-consuming part of any project so I don’t touch them until the client has 100% approved the 3D drawings.
But once we’re ready I draw cabinetry and built-ins as separate SketchUp components (this makes changes easier), add details like shelving, hardware and materials and export technical drawings into Layout with dimensions and annotations.
At this stage, the client sees exactly how their custom joinery (millwork) will look and these drawings are what the joiner or builder will use to create shop drawings.
Drawings are communication documents that help you communicate your design ideas, so I try and include all sorts of elements in my drawings to ensure it’s very clear what I want.


Step 5: Lighting & Electrical Plans
The final step is lighting and electrical planning as clients often ask for recommendations on where to place lighting, power points (GPOs) and switches. I use Layout to create a simple, easy-to-read plan that they can take to their electrician for further refinement and installation.
While they still need a licensed professional to execute their electrical plan, this step helps clients feel confident about their lighting plan before committing. For many, lighting design is an afterthought, I personally think it’s integral to taking a boring design and making it something special.


Why I Only Use SketchUp
Unlike many designers who switch between multiple programs, I do everything inside SketchUp and Layout. This streamlines my workflow and makes my design process faster and more efficient.
Clients love how visual and easy it is to understand and I love how much time it saves me (plus SketchUp is actually really fun to use as well!).
So whether you’re a professional designer, a home renovator or just experimenting with design, SketchUp is a powerful tool that lets you explore and document your ideas.
If you want to learn how to use SketchUp for your own design projects, check out my SketchUp courses. I walk you through everything from drawing up a floor plan to creating detailed construction documents. As of writing this we’ve taught over 14,000 students to use SketchUp :)
Want to learn SketchUp?
Watch my free information session to get started…
If you want improve your work with design clients or you are about to start renovating or remodeling then you will love SketchUp.
With this software you can:
mock up an entire home in 2D
create floor plans
draw joinery/millwork elevations
create lighting and electrical plans
work in 3D so you can picture exactly what your design will look like when it is finished
create renderings and perspective drawings
prepare your technical drawings for use with your clients, trades and contractors.
Learning SketchUp will save you time, money and mistakes.
It is a well known piece of software in the interior design and architecture industry and will give you a solid technical drawing skill that will immediately upgrade the professionalism of the work you are doing.
I teach an online course for beginners that is focused specifically on using SketchUp for interior design purposes. We have had thousands of students come through the course with so many fantastic projects designed and built!
We have all sorts of students in the course including designers and architects, cabinet makers, home renovators/remodelers, kitchen and bathroom designers, event planners, landscape designers and design enthusiasts.
If you’re curious about SketchUp then start with my free information session.
In this session I share:
⭐️ my full interior design process using SketchUp and Layout, step by step
⭐️ how to get started with SketchUp
⭐️ plus answer some of the FAQ I get asked about my online courses.
If that sounds of interest then sign up for a session here:
Enjoy the rest of your day!
Clare x
Dr Clare Le Roy