Most people don’t realise what is possible with SketchUp and how much you can achieve with just one piece of design software.
I have personally only ever used SketchUp in my own interior design workflow with clients and people often ask me why I chose SketchUp over other software options on the market.
Here are some of the reasons:
-
It’s industry recognised - most large design firms around the world have designers using SketchUp. It’s well recognised in the industry and is a good technical drawing skill for any designer to learn.
-
It saves me money - SketchUp is great for small design studios or solo business owners like me as it’s very affordable. In fact SketchUp is quite a bit cheaper than most other design software on the market. And because I can do everything in my interior design workflow in one piece of software it means I only have to pay for one software subscription.
-
It is easy to learn - which is great as it meant I could get up to speed quickly with using it and starting to create projects for my clients.
-
It looks really professional - creating your designs in SketchUp and then presenting them for clients using Layout immediately upgraded the professionalism of my work.
-
It’s fun! - It’ so important to love and enjoy what you do and when I’m creating in SketchUp it honestly feels like play rather than work :)
The final reason I love SketchUp is that it’s so versatile. There are so many ways that I use SketchUp in my design workflow with clients and below I share just some of the possibilities using some examples from my own projects over the years.
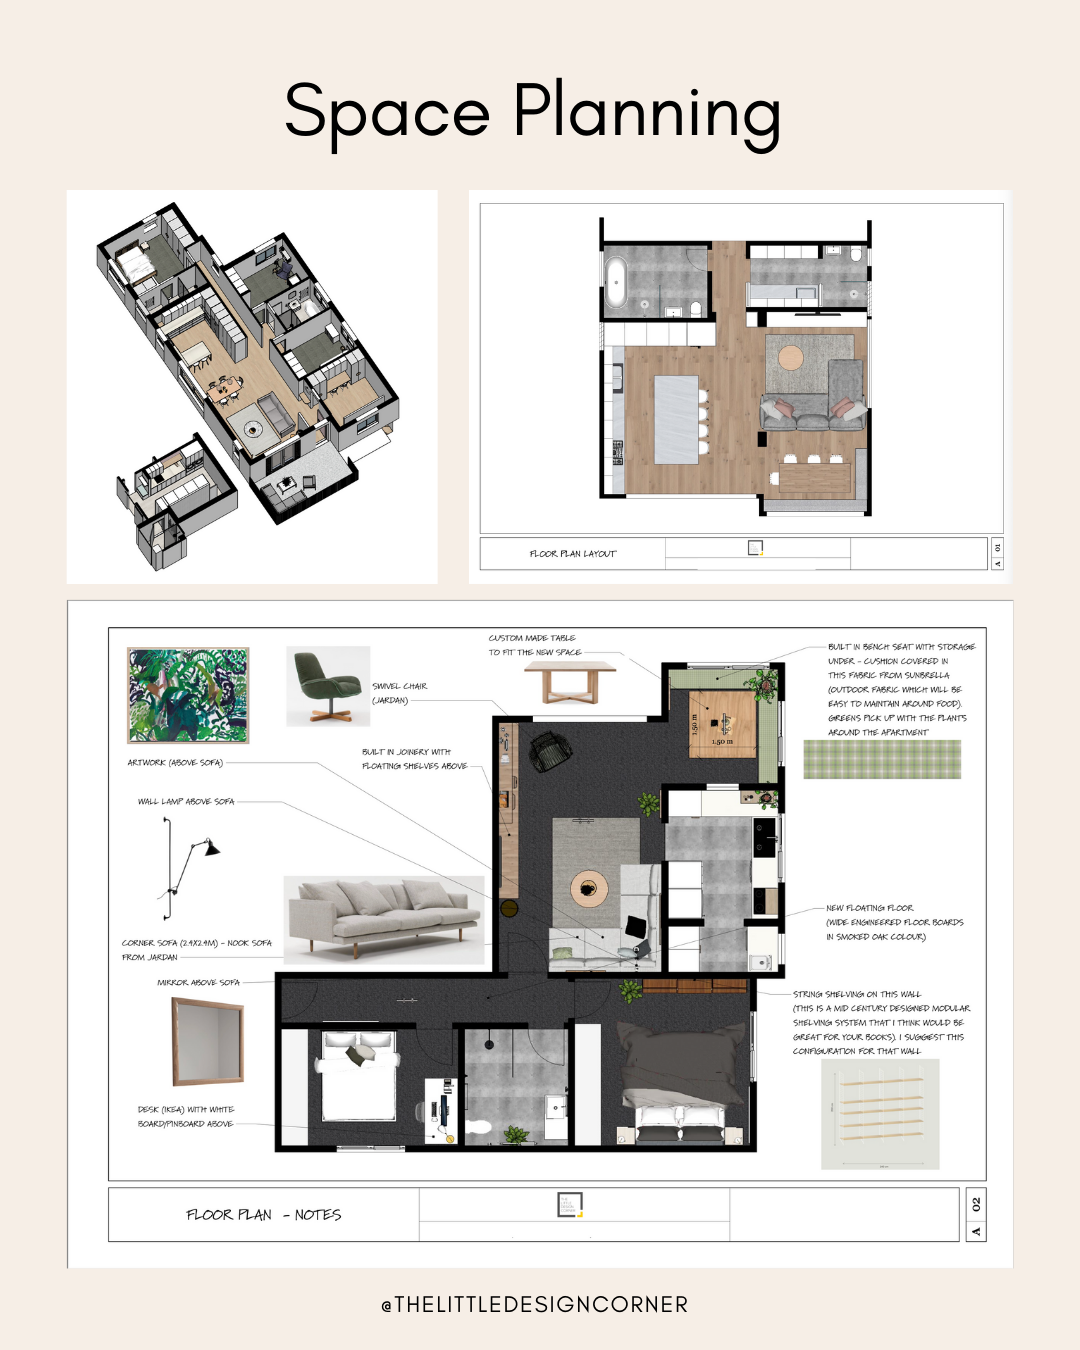
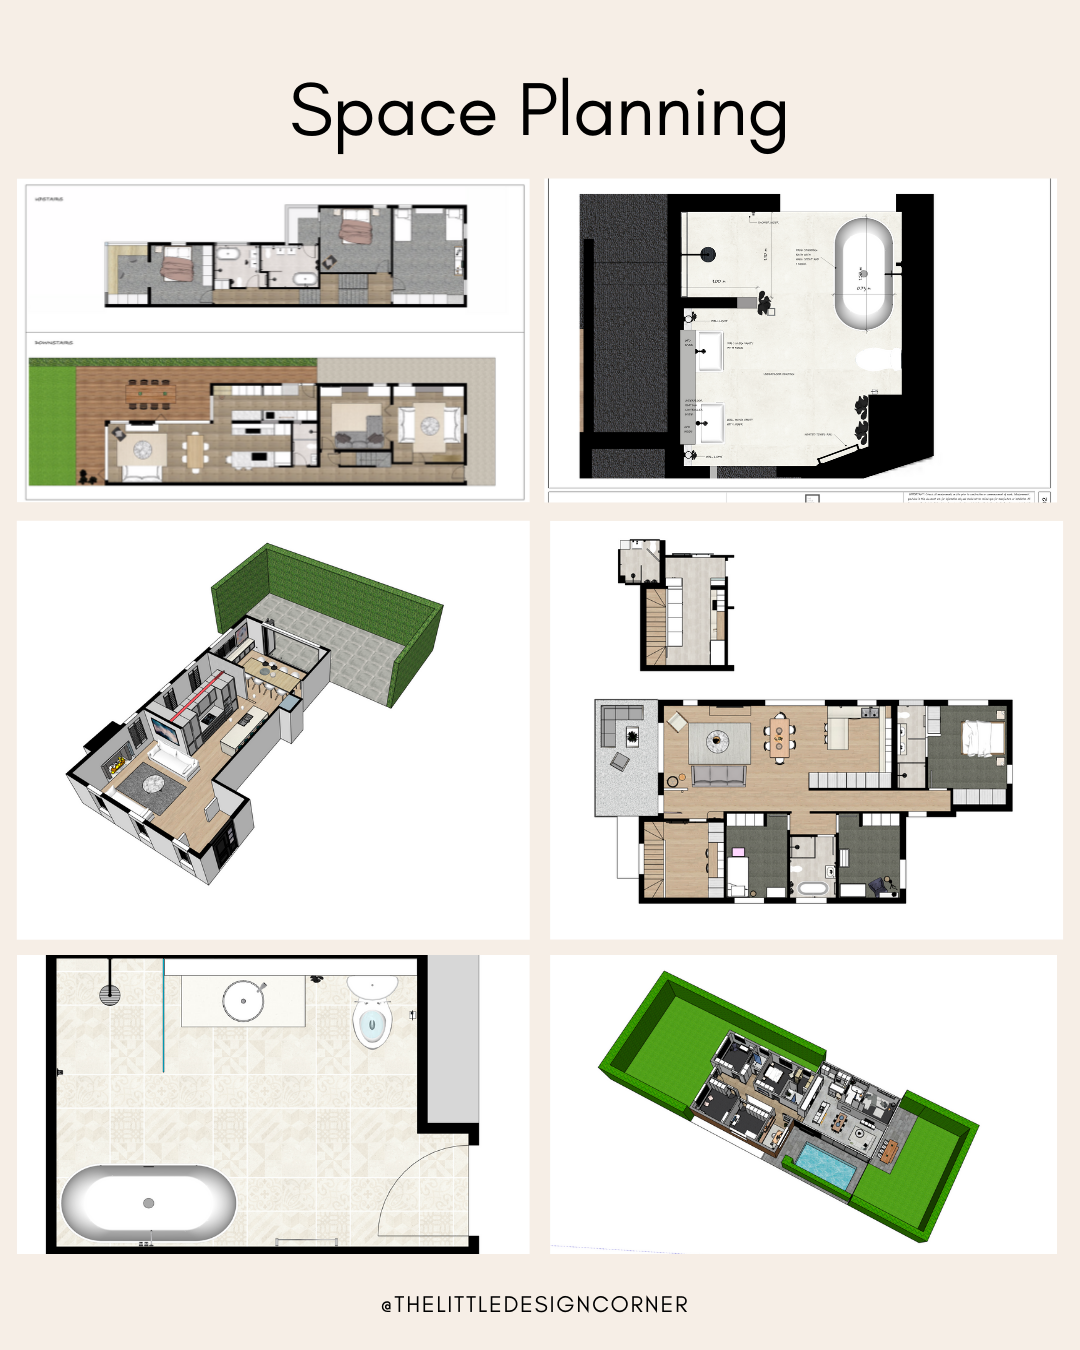
1: Space Planning
Space planning is the first part of most of my design projects with clients.
In SketchUp you can create both 2D and 3D space planning options for clients to help them visualise the ideas you have for them.
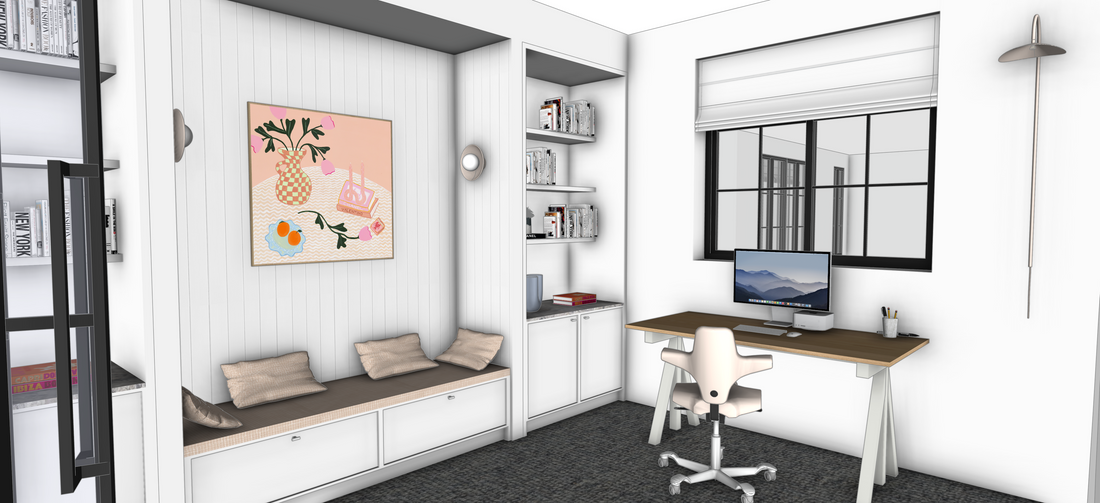
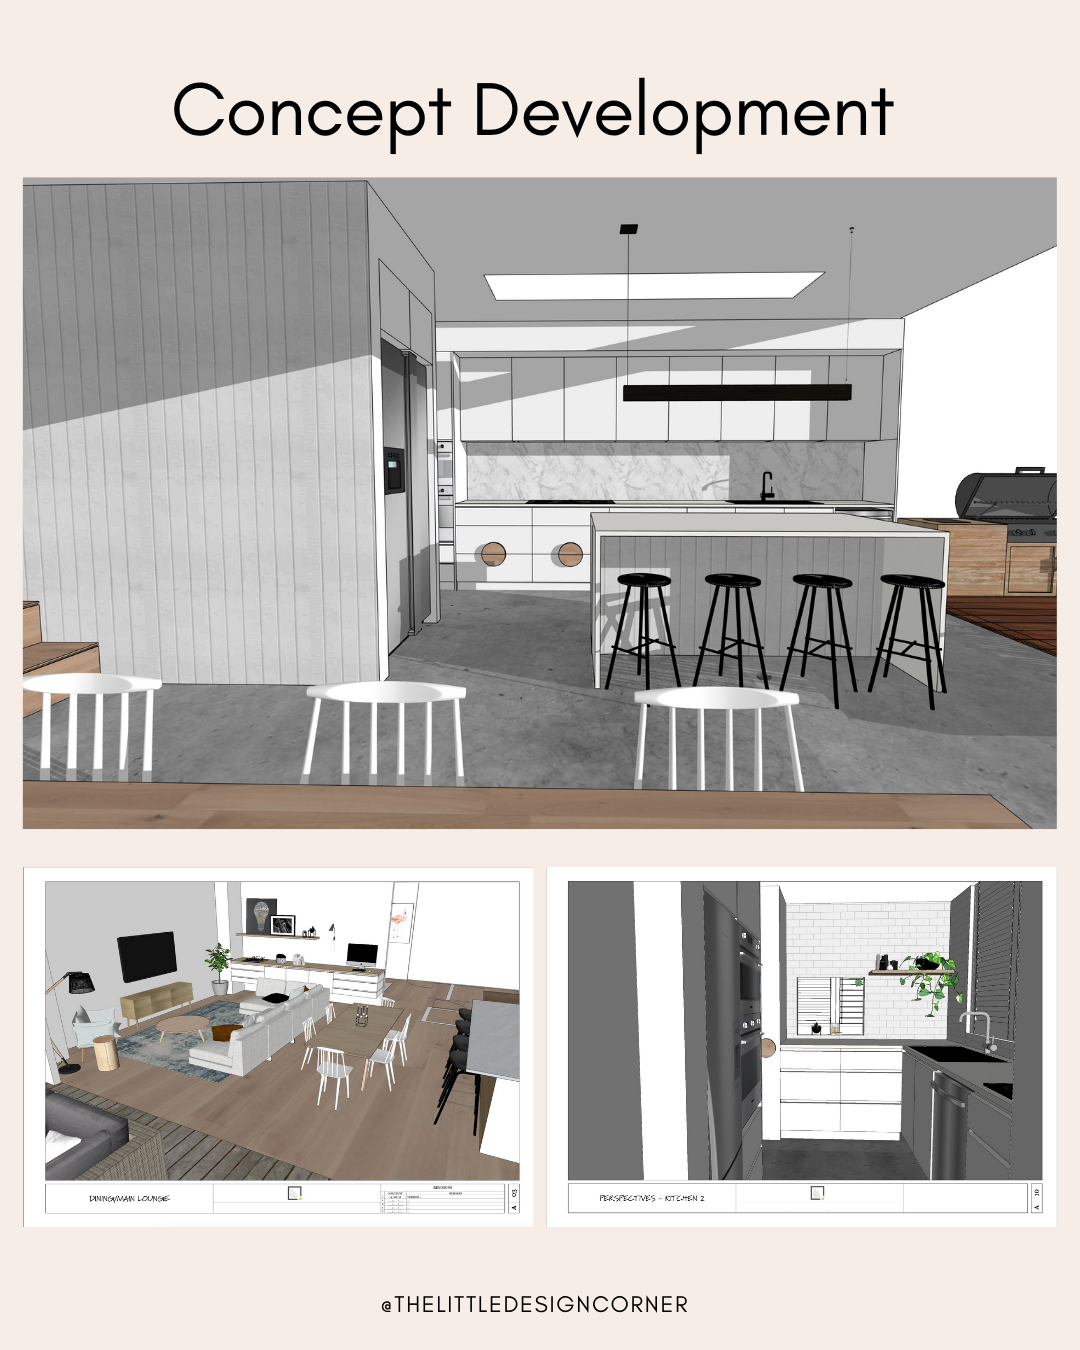
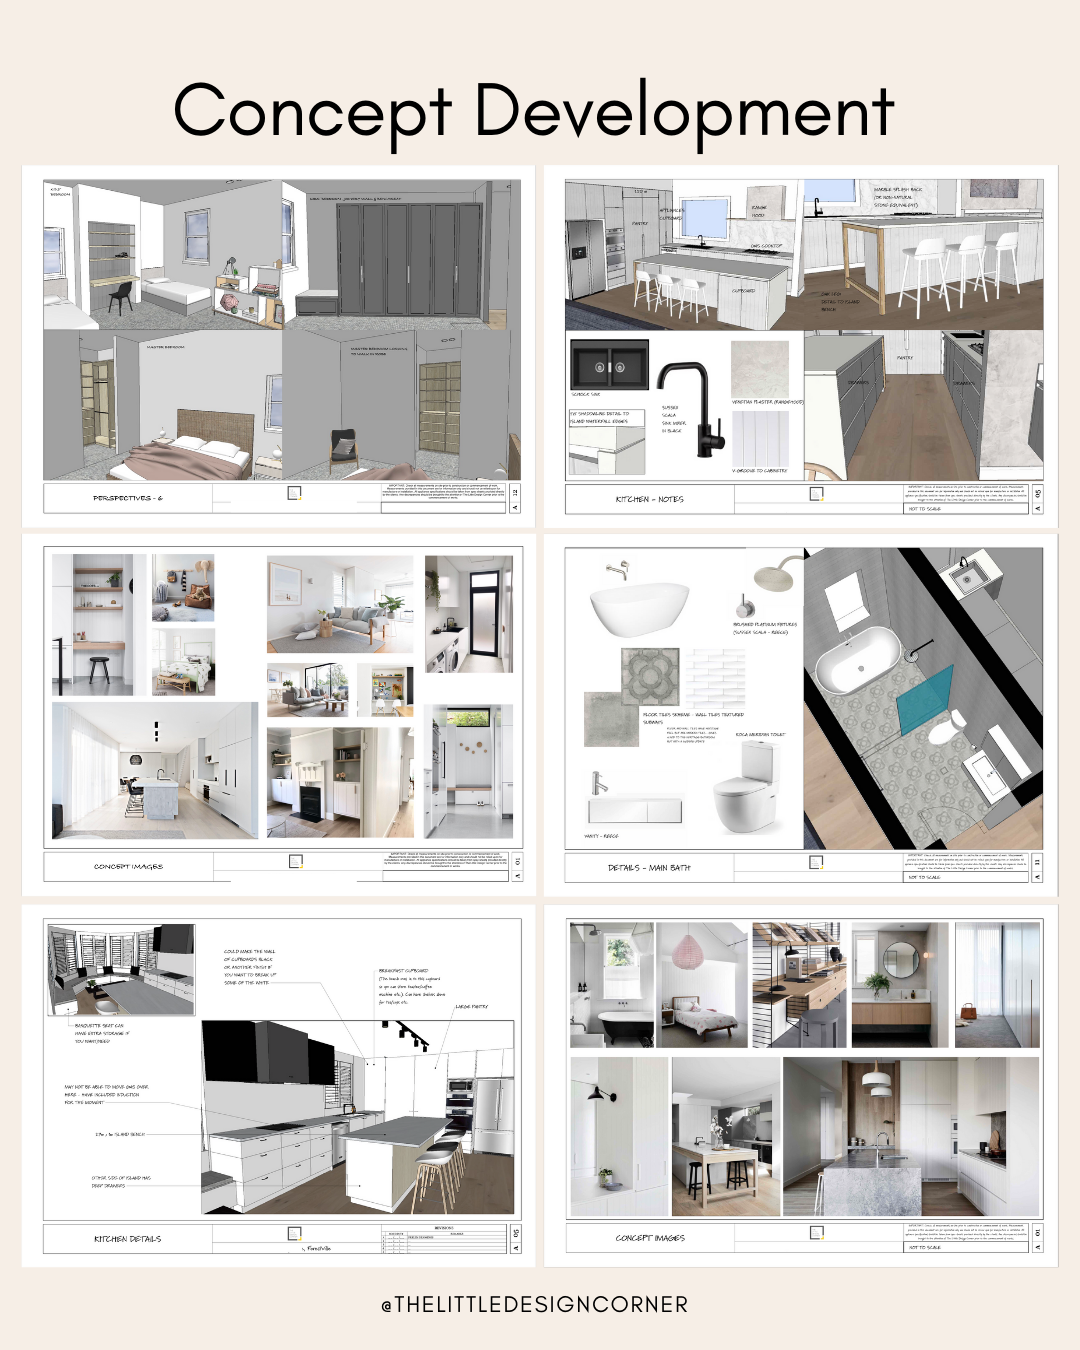
2: Concept Development
Once a space plan has been agreed to I prepare some concepts in 2D and 3D using SketchUp.
This might have options for joinery/cabinetry as well as some furnishing options and things like that.
Once my ideas are created in SketchUp I then bring these in to Layout and create a professional concept to present to the client alongside samples and materials I may have collected from suppliers for discussion. You can see an example of this sort of concept document in the right hand image below.
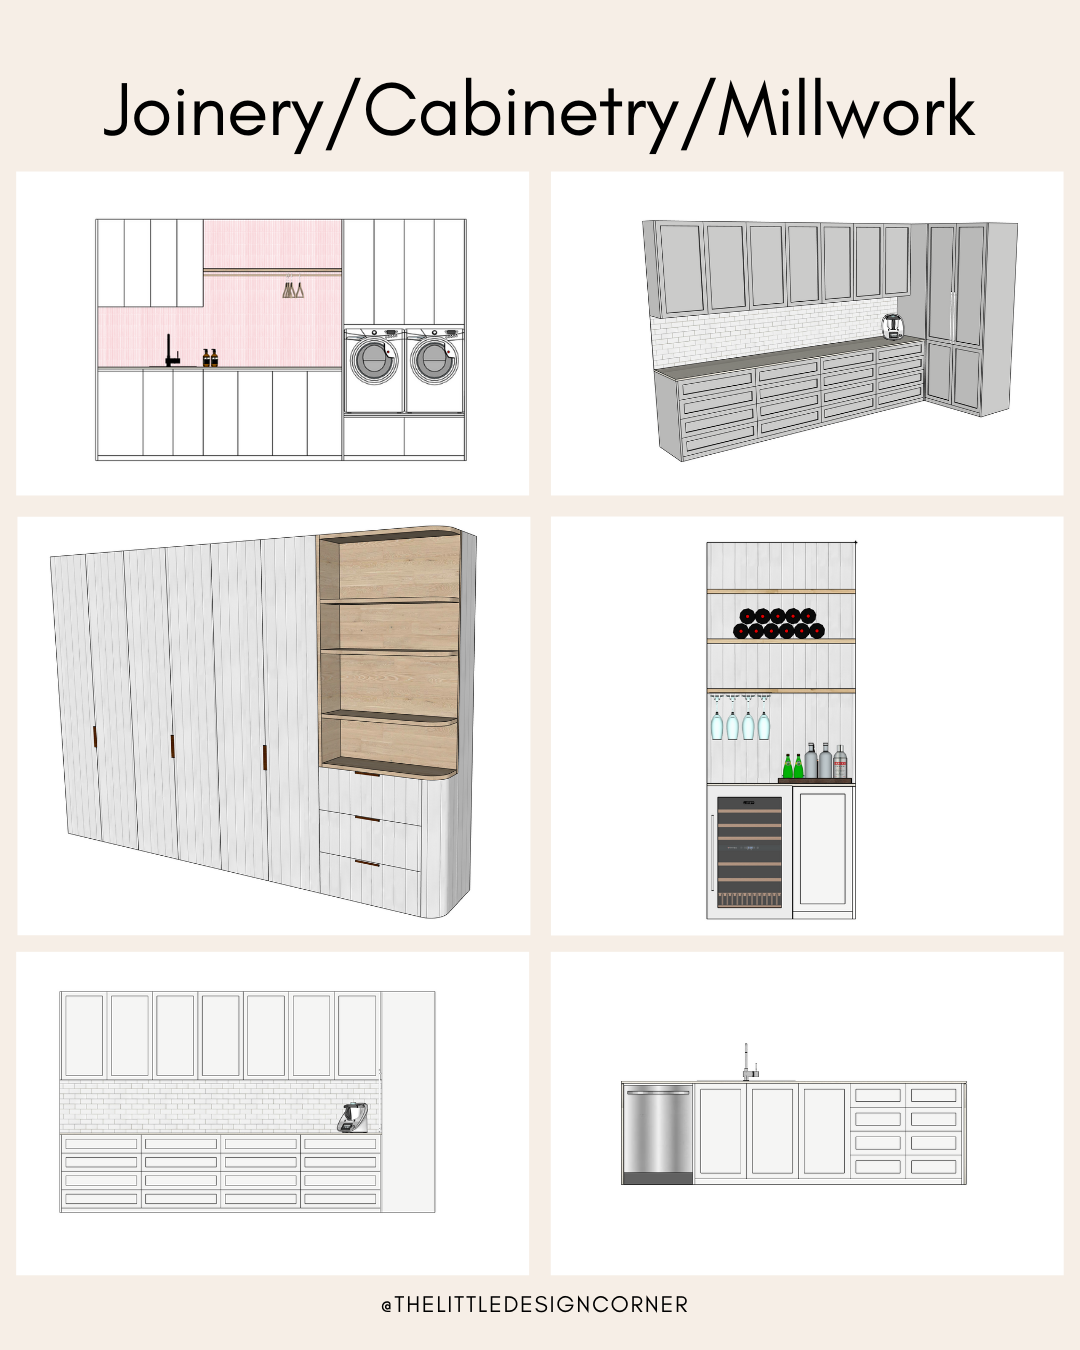
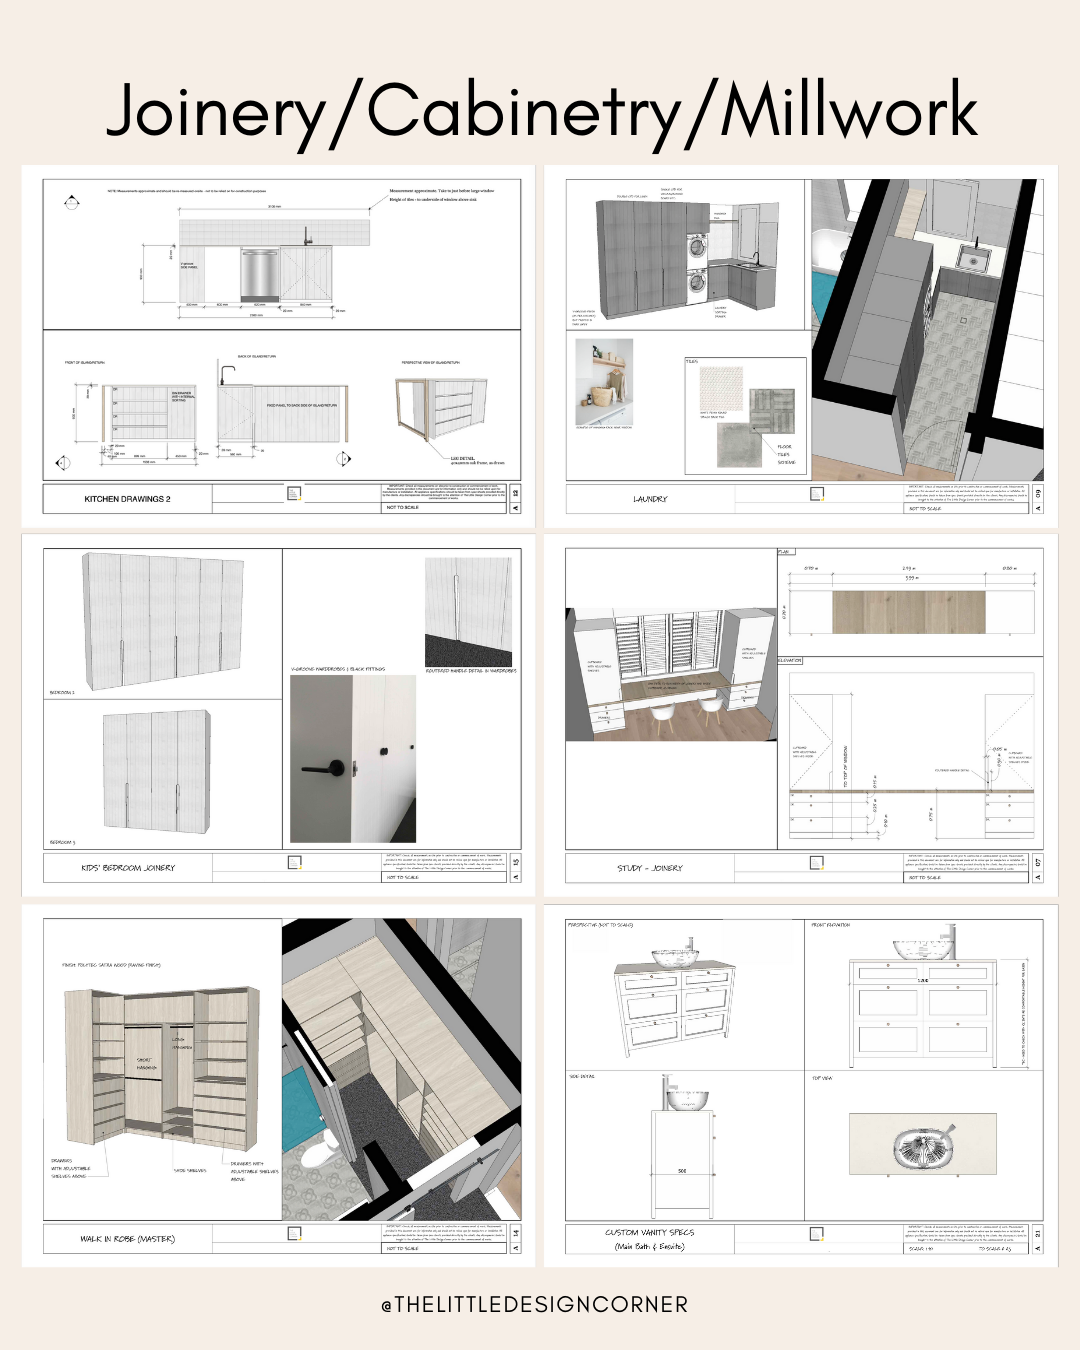
Joinery/Cabinetry/Millwork
Once the concept has been signed off it is time to start designing everything in more detail. So this is where I will draw the cabinetry up and show all the intricate design details.
Again, once the designs have been created in SketchUp I move these over to Layout so I can create documentation drawings that are to scale. On these drawings I can then add dimensions and other details for the builder/contractor/cabinet maker to work from.
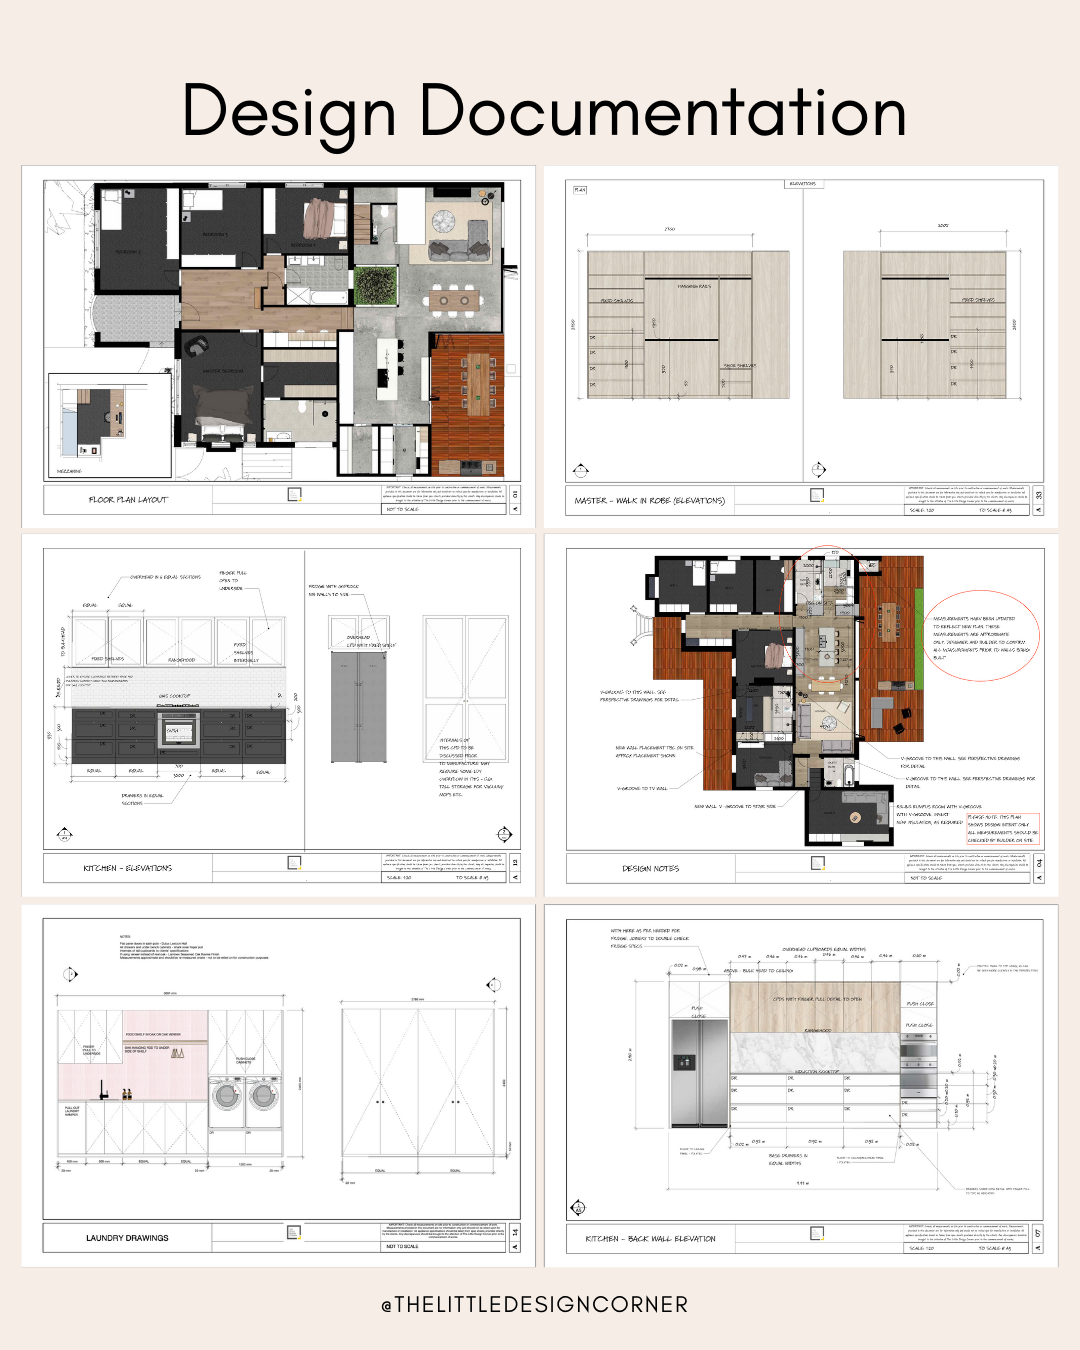
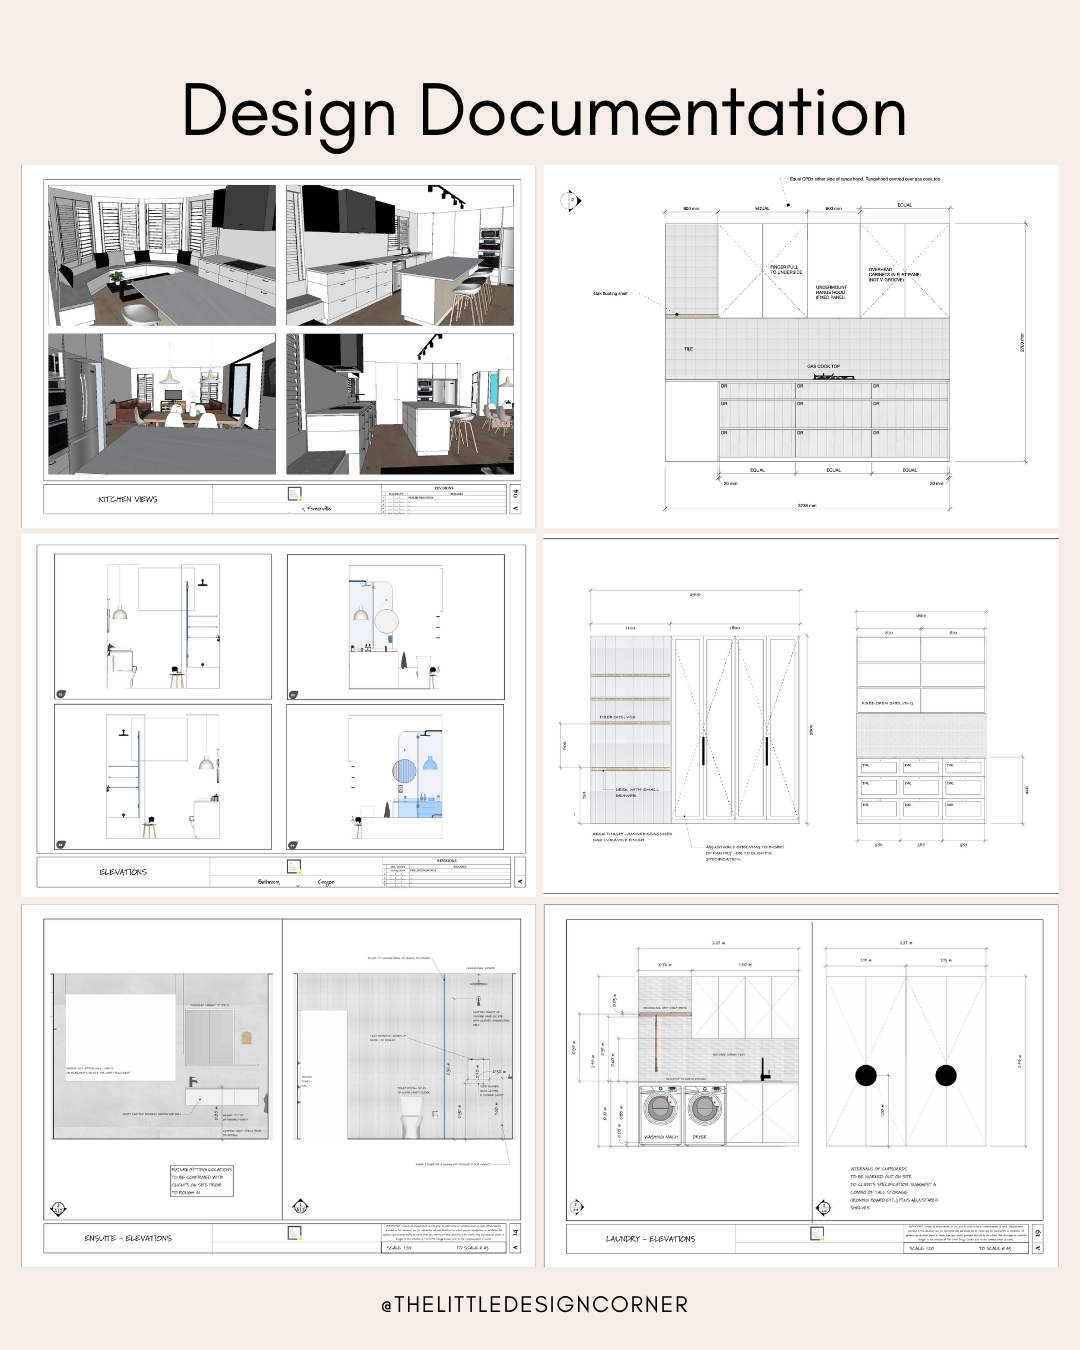
Design Documentation + Detailing
The final part of the initial design process on a project is to put together the detailed documentation drawings. This is by far the most time consuming part of the design process for me as a lot of work goes in to these drawings.
Although the documentation would vary from project to project (depending on what I had been engaged to work on) this documentation set would normally include:
-
concept images
-
space planning and notes for contractors/trades
-
3D perspective drawings
-
2D plans - to scale
-
Detailed documentation for all cabinetry in the project - e.g. kitchen, bathrooms, laundry, mudroom, wardrobes/closets
-
Lighting and Electrical Plans (see below)
-
Fixtures and Fittings Schedules (see below)
-
Furniture and Styling Packages (see below)

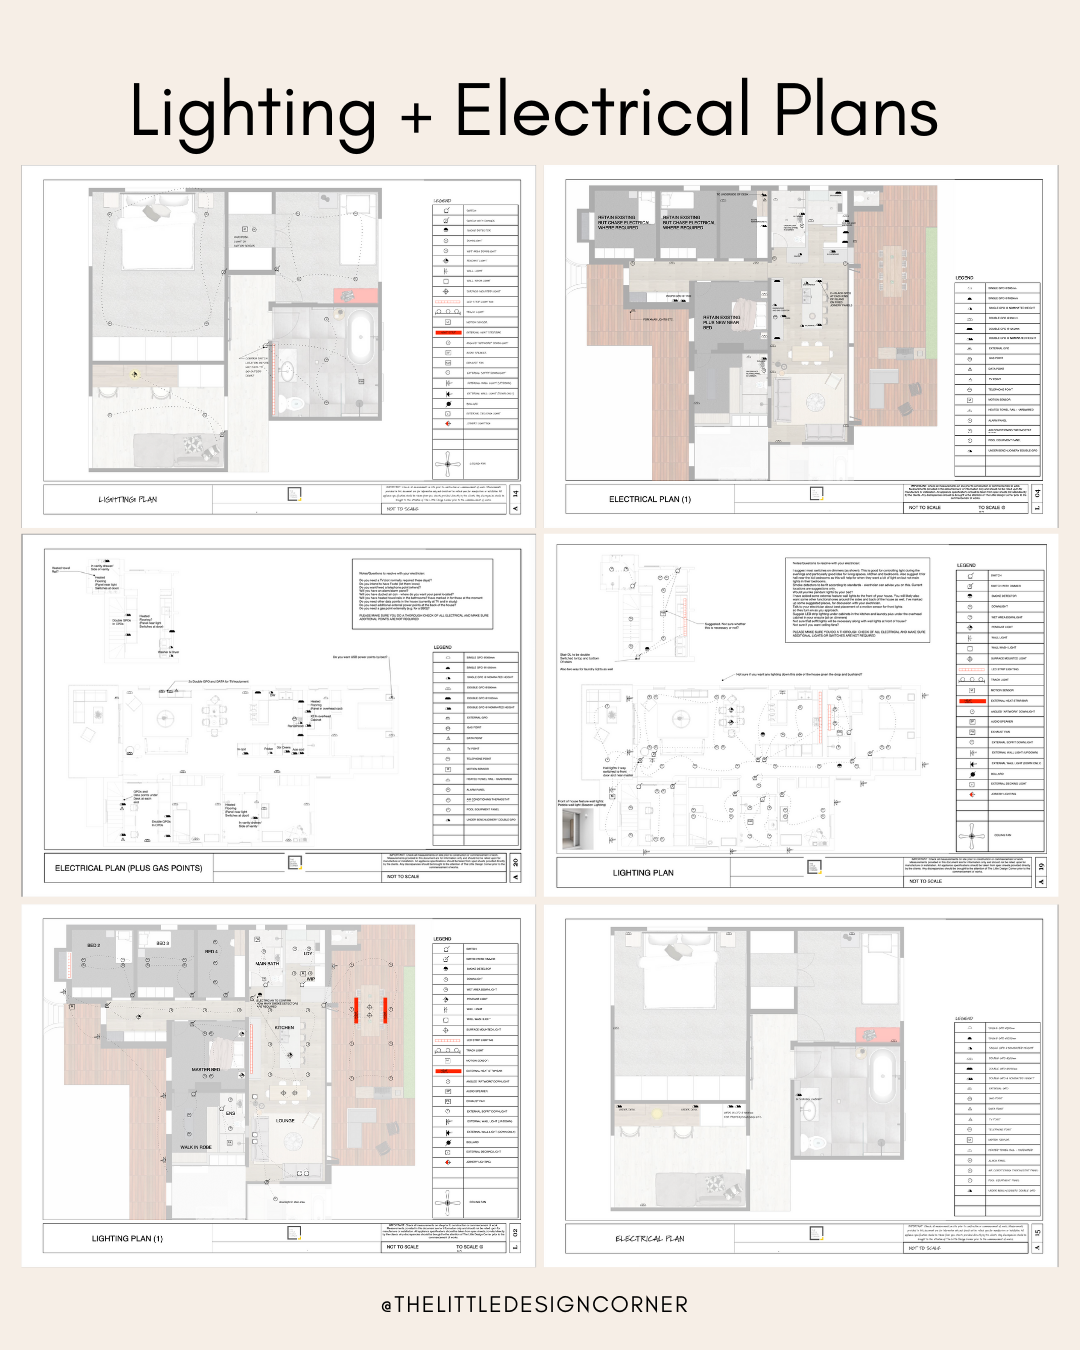
Lighting + Electrical Plans
In some projects I would also put together lighting and electrical plans for clients that they could use with their electrician for the installation of lights and electrical work.
I would create these plans inside Layout and we learn how to do this in my Intermediate SketchUp course (where I have free templates that you can use for this purpose as well).